|
| BEFORE |
 |
| AFTER |
One of the best ways to lower the height of a motorcycle is to cut the seat. It's cheap, fairly easy if you are patient and even if you blow it it's not to expensive to fix (on my KTM a new replacement seat is about $100).
I have pretty short legs (a 28" inseam) so I decided to cut the seat on my KTM as low as it could go. Obviously, you can cut your seat much less than this.
What do you need- a pneumatic staple gun. You can't do this with a hand held stapler, don't even try. Alternatively, you can do everything else, and then bring the seat to your local upholstery shop and ask them to staple the cover on for you. I've done this and its very quick and easy for a pro, maybe 15 minutes!
- stainless steel staples (no rusting!) I use 1/4 deep. You want them short so they don't go through the foam.
- a LONG bread knife. The longer the better. I use a 10" one.
- a Surform flat file. Get one, it's worth it. I've heard guys do the final shaping with sand paper... that must take forever! The Surform makes it easy.
- a vacuum cleaner to clean up all the foam bits and dust
- a day without wind (or a well lit garage)
Step one: PhotosTake pictures of your existing seat for reverence. Particularly take shots of the existing staple work so you can reference them when you put your staple on. The bottom of most seats is irregular, and seeing how the factory placed the staples can help.
Step Two: Cover RemovalRemove the existing cover. In some cases you might not have to take it all the way off, like if you only want to trim the front of the seat. I use a pic to pry the staples up:
And then pliers to pull the staples out:
Step Three: Marking the Seat This is the
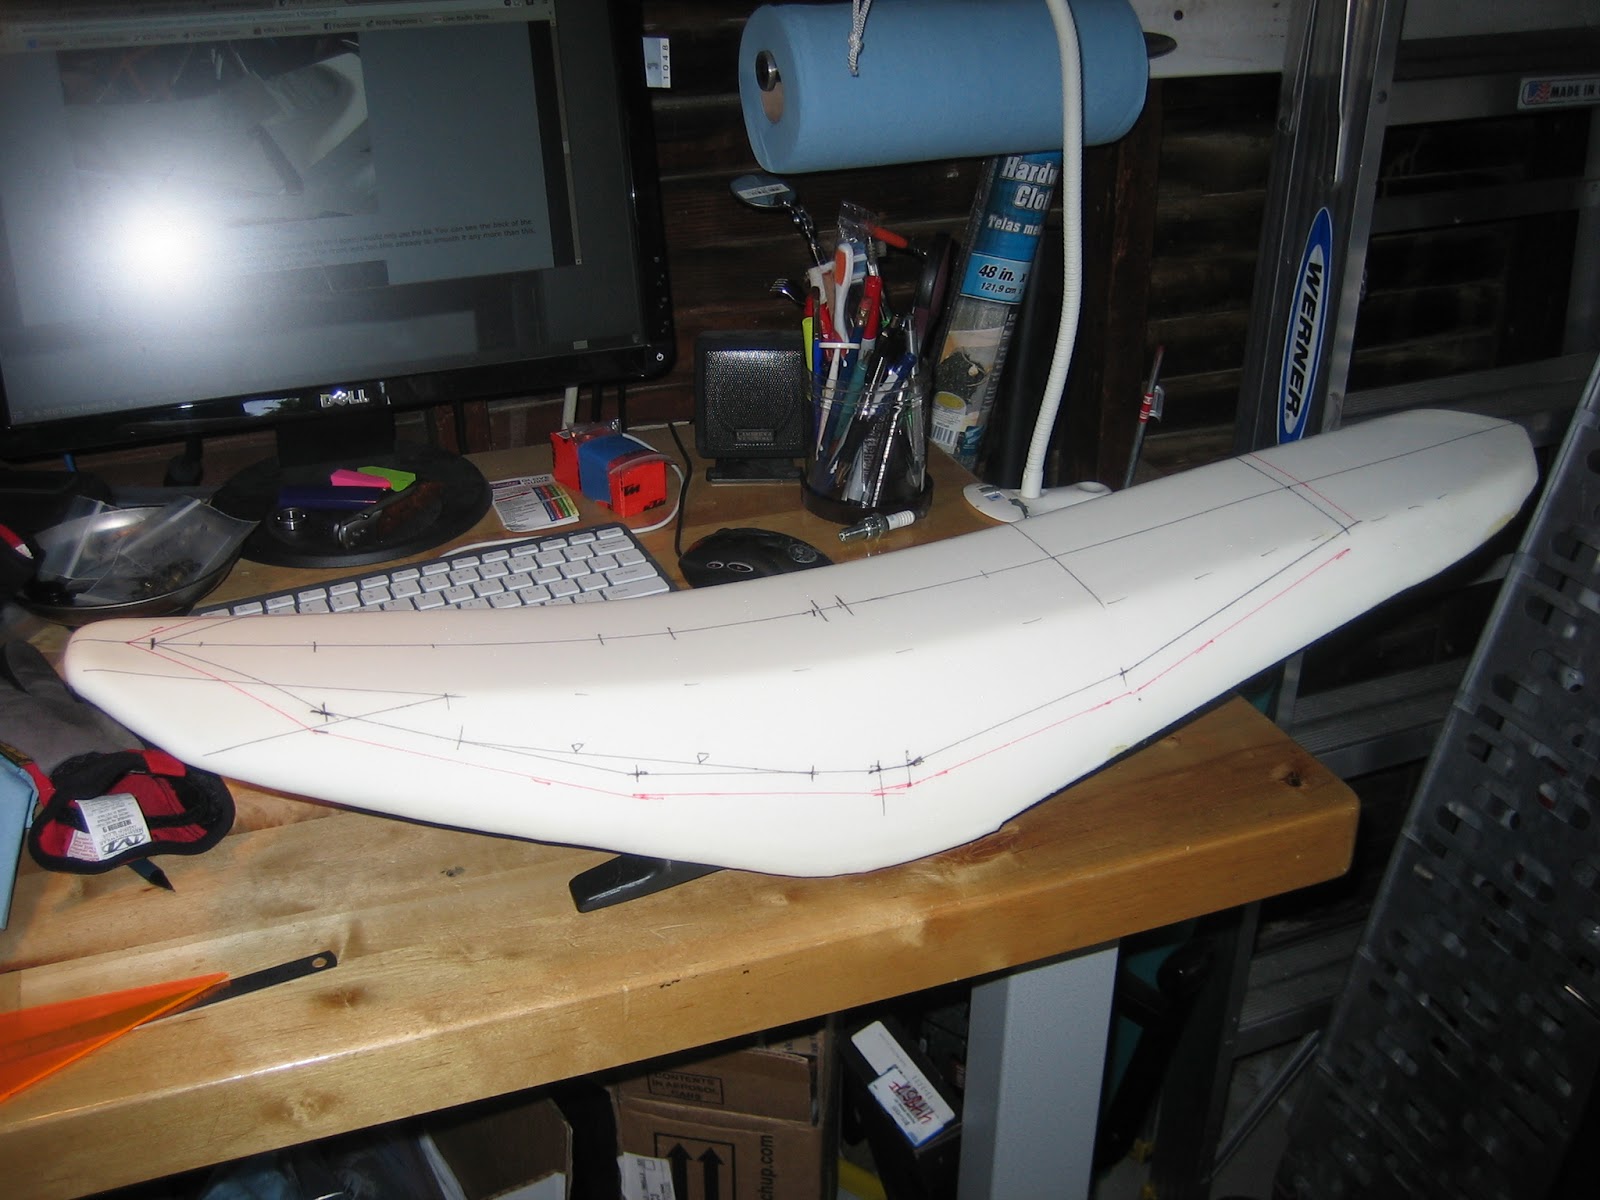
important part to get right. Mark a line down the middle of the seat from front to back with a fine point sharpie (felt tip pen). Then mark a cut line on both sides of the seat. Measure down from the center line to be sure the lines on both side are symmetrical. You can see I have all sorts of marks that I used to make my measurements. The black line is the "cut line" is where I want to cut. It is important to make another line a "reference line" (I used red) a bit below the cut line! Because after you cut and file a bit, your cut line will be gone, the red line below serves as a reference after the cut line is obliterated. (I learned to do this the hard way.)
You need to be very careful to look at the underside of the seat and to be sure you leave enough foam to protect your butt from the seat pan. This is the time to inspect, measure and mark carefully. And then to check it all twice more.
Step Four: Cover the BikeCover the bike and put the seat back on. I've done this without covering the bike and foam got everywhere... not good as you don't want foam bits to melt onto hot parts of your bike next time you run it. Cover the bike to prevent this problem. Also, do this on a day without any wind, otherwise the foam filings will blow everywhere!
Step Five: Cut!Cut the seat. The picture below is from cutting my old Husky. Getting started can be hard, especially with a thin cut. It might be better to make the first cut in the middle where it is thickest. A long knife allows you to hold both ends and watch the cuts on both sides of the bike. An assistant can be helpful with this too... my wife was kind enough to watch the far side and warn me if I was heading off course. You really need a knife longer than the cut you are making. Note on this cut on the Husky seat I don't have the extra red line for a reference. It would have been easier with that.
Here is the slice I took out of the KTM seat. You can see I started in the middle where it was a thick cut and did the front part and then I cut the rear. Frankly, it's easier to make a big cut like thin than a thin one! It's like cutting soft bread!
Step Six: File or Sand
This is a great shot. This is right as I started filing with the Surform. You can see the uneven cut marks from the bread knife. You can also see the red marking line that will help me keep the seat even after the other black line has been obliterated.
And here is the seat after I finished filing the flat top. You can see it's smooth but not perfect. Small imperfections will be invisible when you pull the seat cover tight over the foam. Get the seat as good as you can but don't worry any small stuff.
The original KTM seat has a bevel, it's not a flat top like above. So I drew a new center line and two other lines parallel to it to mark where the bevel would end. I wanted the bevel to end crisply on the top. Some people might prefer it to be rounded but this was my choice. I also added some marks for the bottom edge of the bevel, but they aren't in this photo.
Here is a picture of me making the final bevel with the Surform file. I use the Surform to do all the final touches.
Step Seven: CoveringI use a layer of thin plastic wrap from the kitchen over the seat. I'm not sure this is necessary, but I'm a bit concerned the raw seat from the cutting might be more likely to absorb water. Hopefully this thin plastic layer would prevent that. You can also see the sharp edges I made on the bevel and the remnants of the pen marks I made to guide that filing.
And here is a shot of the scotch tape I used to hold the plastic wrap in place while I covered the seat.
Now it's a time to stretch the cover on. You saw earlier I removed a lot from this seat, so I had to work stretch the cover tight Fit the ends over first and put a few staples on those ends to hold it in place if necessary. Then do the middle! The middle really has to be tight first before you can work back to the ends. You don't want to end up with loose material in the middle of the seat.
Here are some shots of all my stapling.
Finished!Here are my shots of the finished seat. This is just about as thin as this seat can be. Note how nicely the bevel came out and how nice and smooth the cover is. I'm really happy with it.
Another sampleThese are shots of my Husky that I did about a year ago.
On this seat I removed much less foam. You can also se that I left this seat a bit rougher before covering it. The front foam was very thin and I was just hesitant to file too much away. The ridges in the foam ended up being invisible through the cover, but you could just feel them with your hand if you checked. So Ideally you would sand it a bit smoother than this. But you can how nicely even this thin cut came out!